output
Optimising Video with Apple Shortcuts in MacOS
Optimising Video with Apple Shortcuts and convert from .mov to .mp4
Introduction
At Tapadoo we handle a quite big amount of multimedia during development, that can either be used to demonstrate how to test something, an incorrect behaviour or guide a client trough a new feature. Focusing on the later point, some of our clients do not have a Mac so then they don’t have access to the Apple’s .mov video format.
Another thing to keep in mind is that our issue tracker server has limited memory and so, it is important for us to be mindful of the memory usage of our media, specially videos.
To solve these two problems we can use an Apple Shortcut that can create a smaller .mp4 version of any video.
You can download the already done shortcut from here. The only requirement is to have the HandBrakeCLI in your path (see below)
Minimising a Video trough CLI
To minimise a video’s size without a user Interface we will use a tool called handbrake, which you can also use as a standalone app with GUI, but to be able to use trough Shortcuts we will need the CLI (Command Line Interface) which you can get following the next steps:
- Go to Download Handbrake CLI
- Download the MacOS Universal
- Open the
.dmgdownload and move theHandBrakeCLIexecutable to your desktop or a folder that you can identify.
Once downloaded and saved to a folder, open your terminal app and type (or modify if you didn’t move moved it to your desktop) the following command, which will make the app available to you user without typing the full path.
sudo mv ~/Desktop/HandBrakeCLI /usr/local/bin/HandBrakeCLIAfter doing that you will be able to optimise any video trough your terminal, for example, the following command will take a video named forgotemail with a .mov extension that weights a wooping 42.7 MB into a .mp4 file that weights a simple 4.5 MB:
HandBrakeCLI -i forgotemail.mov -o test.mp4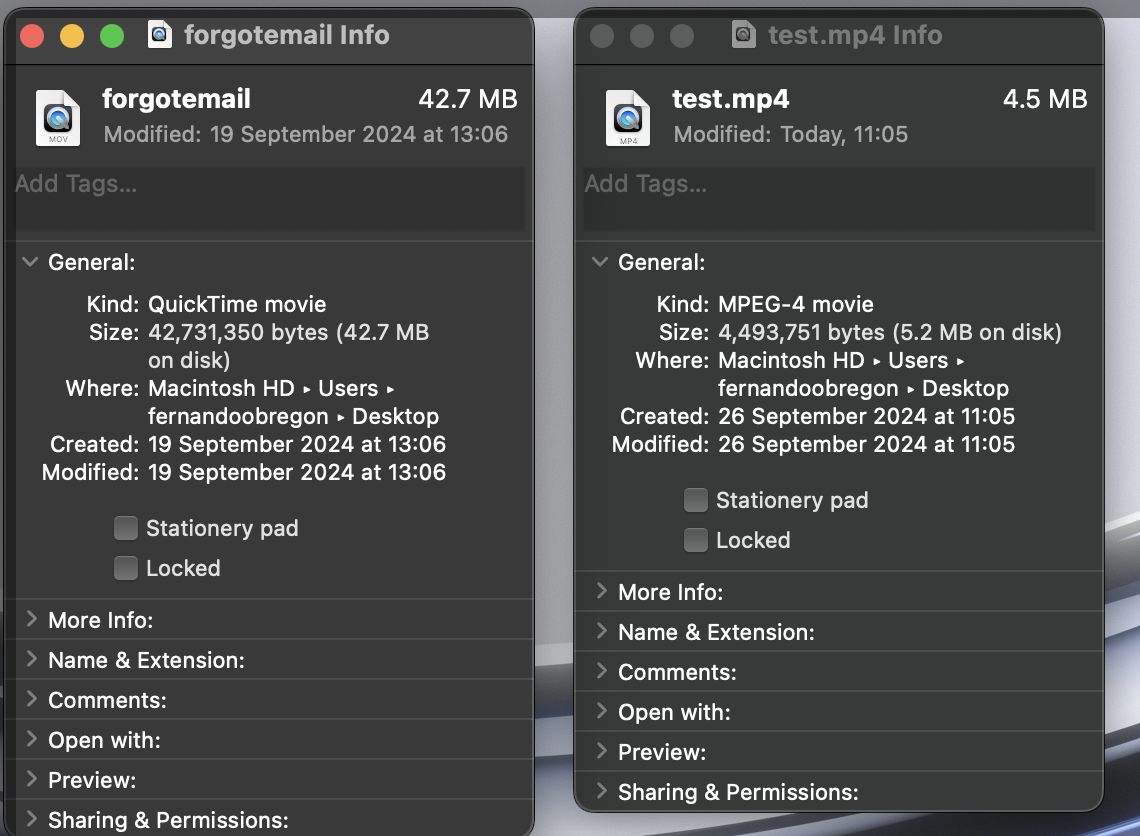
Simplifying it by Making available trough Apple Shortcuts
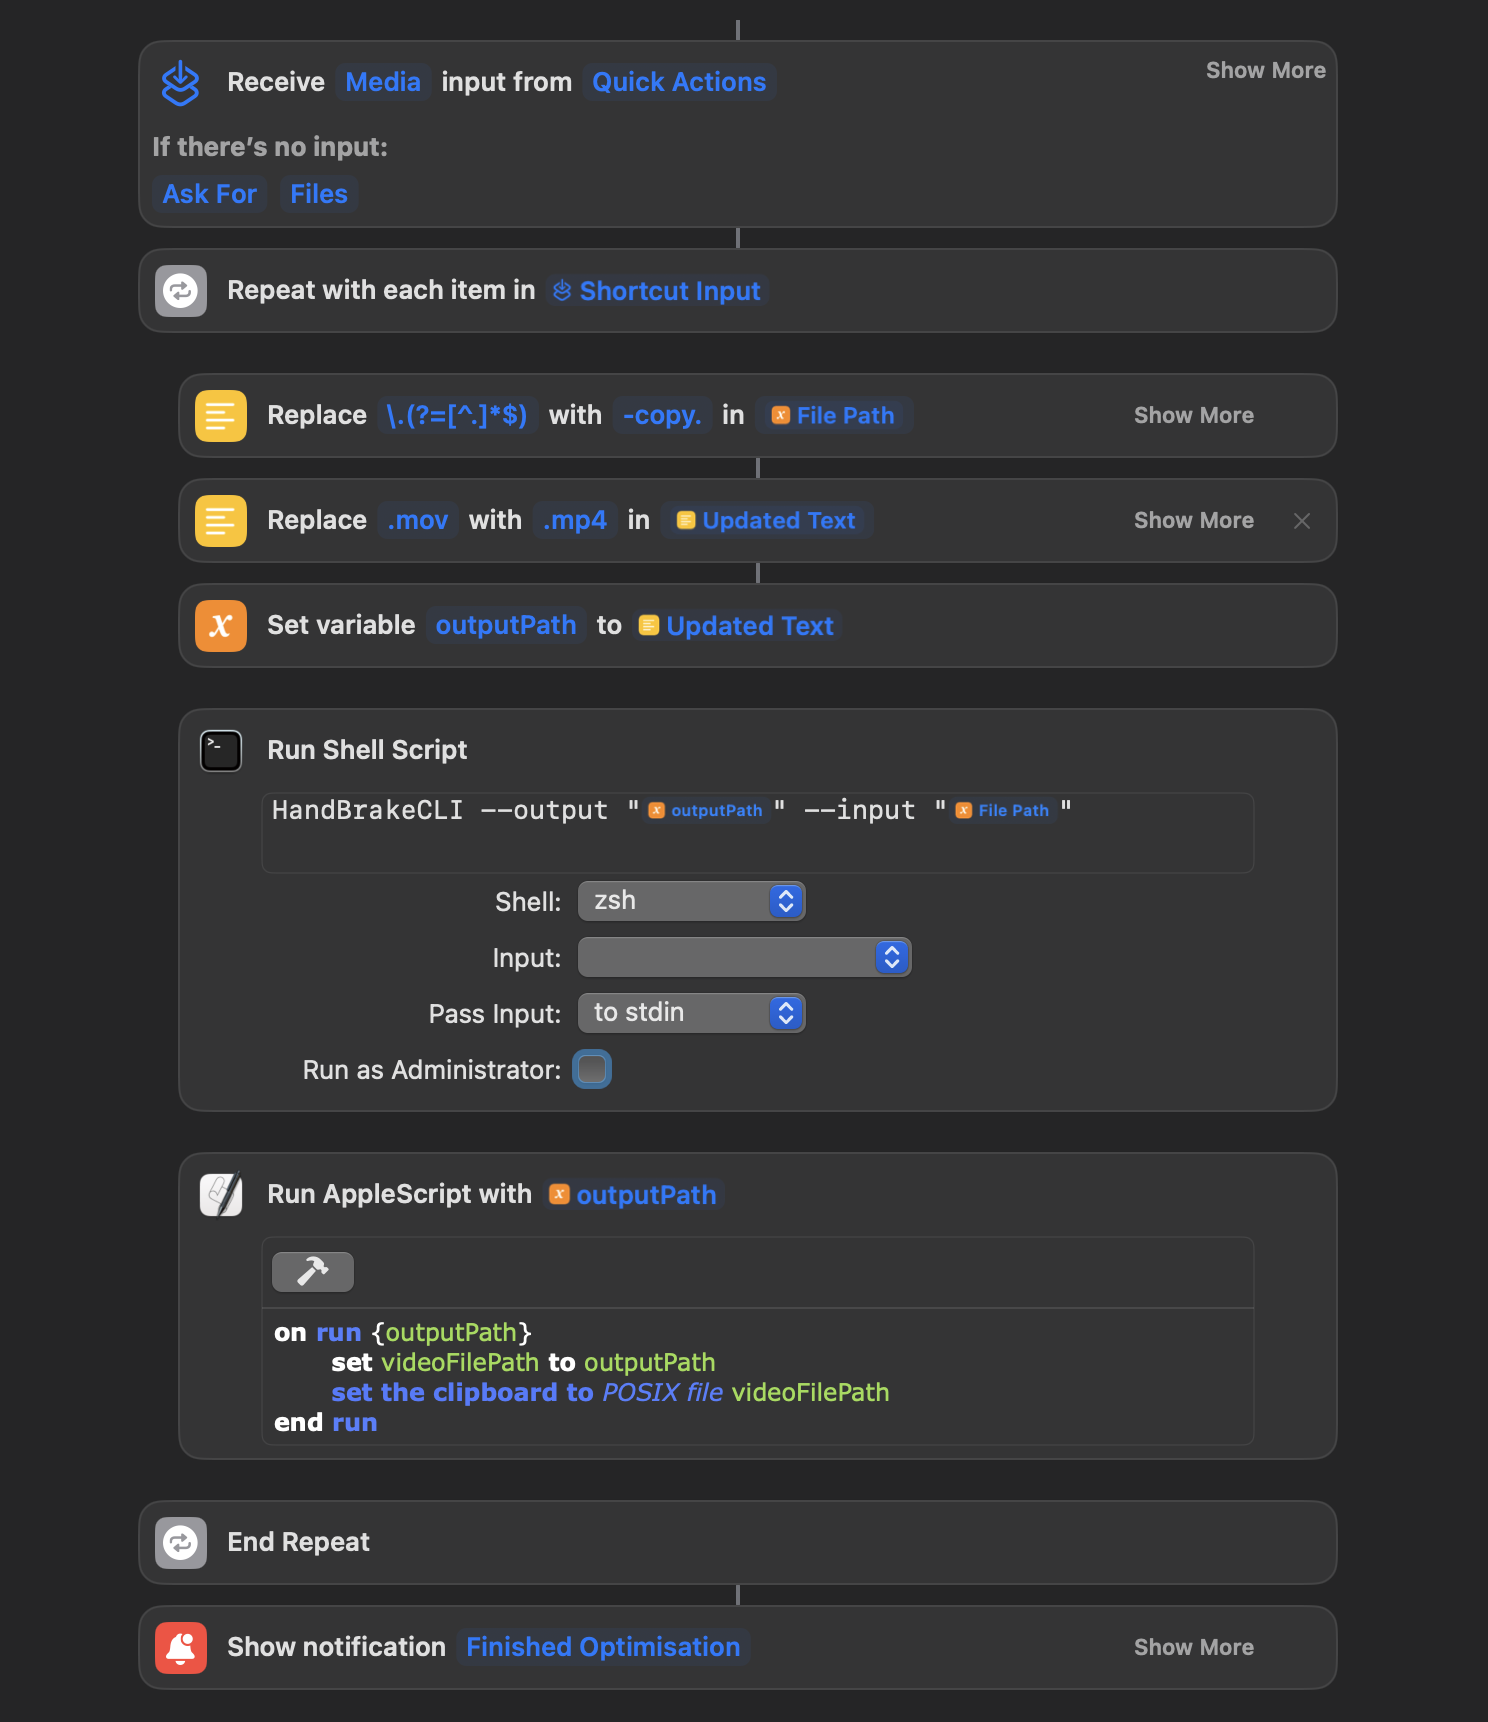
That was great! we reduced the size of a video by 10X with little to no quality loss. But you it is not great having to open your terminal and type the video path and decide which name to give the output. This can be simplified by using Apple Shortcuts, the following Shortcut will provide us with some extra functionality:
- Optimise a video by pressing right click
- Optimise multiple videos
- Add a
-copysuffix to the new video so you can have the original and the copy - Change
.movvideos into.mp4for better colaboration - Add the Optimised video(s) to your clipboard so you can paste directly into an app, like Youtrack or Slack - useful with a clipboard manager to paste many videos
- A notification to know when the process has finished.
You can get the shortcut into your Mac by accessing this link, and here’s what the shortcut looks like:
Making a shortcut available trough context menu
Once you have downloaded and given the requested permissions to the shortcut, you can add it to the context menu of your videos:
- Right click on a video
- Press “Quick Actions”
- Press “Customise”
- Activate “Optimise Video”
Once you have added to quick actions you can now optimise any video you’d like by right clicking on it and selecting “Optimise Video”